Many Choices
August 2, 2021Money In Your Pocket
August 24, 2021DIY Window Tint
There are many reasons why you would want to tint car windows. From protecting your car’s interior to privacy to reducing glare or making your vehicle look stylish and cool, the list is endless. Regardless of why you want to tint your car windows, you can decide to do it yourself or hire a professional tinter. Read along to learn more about DIY window tinting.
How to Tint Car Windows
As with any other practical project, window tinting can be a daunting task. However, you can have a good tint job that looks professional with the right skills and tools. Some vehicles need more expertise and skill to tint than others, so you must keep that in mind. For example, older cars can be more challenging to tint than a new model car.
The entire process of tinting a car might take several hours a day, so you must find a comfortable place. Also, it’s worth noting that a professional tinter gives quick, better results that will come with a warranty. To that end, here’s how you can tint your car on your own.
Don’t Ignore Laws on Window Tinting.
Like any other modification on your car, you need to ensure that your car tint complies with your state and local laws. Each state has laws that govern the safety of your vehicle, and failure to adhere to them can put you at loggerheads with law enforcement officers.
As a rule of thumb, ensure that your windshield film allows a minimum of 75% of light into the vehicle. Cars that don’t comply with the required guidelines will not be permitted on the road, and we bet you don’t want that to happen to you.
Now that the legality issue is behind us, let’s jump to the film application.

What You Will Need in Tint Film Application
After considering tint laws in your state and deciding that you’ll do it yourself, now it’s time to tint your car windows. That being the case, here are the tools you’ll need in this process.
- Squeegee – you will use a squeegee to remove dirt and debris before you install the film. It is a crucial tool that you don’t want to miss.
- Lint-free cleaning cloth – you’ll need a lint-free cloth alongside squeegee to help remove buildup on the car windows. After all, any dirt or lint on the windows may turn into bubbles once you’ve applied the tint.
- Application solution – you’ll need to use this solution throughout the process, so ensure you have enough of it. You can make the solution by adding water and a few drops of soap to a spray bottle. Remember to shake it up before applying it.
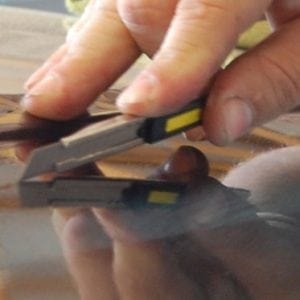
- A razor blade – of course, you’ll need to cut the window film to fit the size of your window, and a razor blade will come in handy.
- Heat Gun – you’ll need a heat gun for rear windows or any other curved window to ensure the tint fits appropriately.
- Hard card or scraper blade – sometimes the squeegee isn’t enough. In that case, you’ll use a scraper blade to tighten the tint and remove all the air bubbles from underneath the film.
Choosing the Best Window Tint Film
As earlier stated, you should purchase tint film only after reviewing your state’s laws on window tints. You can find window tint film from tinting companies, auto parts stores, etc. That being said, these are the main types of window film:
- Dyed film – you may want to buy this film if you are looking for the least expensive window film. However, the film is less functional (less heat reduction) and will fade over time.
- Metalized window film – as the name suggests, this film is infused with tiny metal particles, giving the glass a shiny, reflective surface. Besides, it will strengthen your glass and make it more shatter-resistant. The main challenge with the metalized film is that it may block GPS, mobile, and radio signals.
- Carbon film – unlike metallic film, carbon has no metal particles and won’t fade over time.
- Ceramic film – this is the most durable and effective window film at blocking the UV rays. It contains ceramic particles that strengthen the glass without affecting radio and cell signals. Even so, the ceramic film is the most expensive of all window films.
Don’t Ignore Your Budget
Your budget will largely impact the type of film you choose. You might want to buy an inexpensive window tint kit if you’re a beginner and feel you might mess everything up. On the other hand, you will need to spend more if you need a stylish ceramic finish. Ideally, the tint you choose will come down to what you want after the tint job and your budget.
Preparation
Now that you have everything ready, the next thing is to install your tint right away? No, that’s the wrong approach. You’ll need to find a good location that’s free from dust and debris, probably a garage, and prep your window before installation. Here’s how:
Clean the Windows
The first step is to remove the old tint if your car has tinted windows. If not, then you need to clean your windows thoroughly using a spray solution.
However, before applying the spray solution, ensure that no electronics may be affected by water in your vehicle. You can use a soak rope, door covers, or towels to cover everything. To ensure that the windows are spotlessly clean, use your spray and squeegee. Also, roll down the window a little to clean the window seals, and don’t forget to clean the exterior of the windows as well.
Dry the Windows
Cleaning your window is the first step; you’ll also need to ensure to dry it thoroughly. Use a squeegee to wipe the soap and water solution off your glass before using a lint-free cloth to dry it up. Don’t ignore the corners and crevices as well. Repeat the process on all your windows to ensure they are completely dry.
Prepare the Film
Roll up your car windows and open the film roll slowly. Check to see which side of the film is adhesive and keep it facing your side. The adhesive side of the film has a layer that you should peel off before application. Ensure you have enough soap and water solution for installation.
 Installation
Assuming you’ve done everything right, the next step is to install the window tint film. Here’s what it involves:
Cut the Film to Size
Before you cut your film, spray soap and water solution onto the outside of the window so that the tint film can temporarily adhere for sizing. Once you’ve done this, unroll the window tint film (with the liner side facing you) to cover the entire window (on the outside) – no part should be left visible. Cut your piece about 2-3 inches wider and longer than you need. You’ll remove the extra part later.

After that, use a razor blade to cut the perimeter of the film to disconnect the piece from the roll and have a usable square. Don’t forget to include extra inches on each side. At this time, you’ll notice that the square adheres to the solution easily. Spray the tint film until the soap and water solution covers the entire thing.
While still ensuring that the film adheres to the glass through the solution, cut only the straight lines using a razor. Don’t cut the rounded part of the window at this moment.
After this, pull the film about 1 inch over the straight edge you’ve just cut to ensure you have enough fill to cover all edges. The next step is to cut the side that goes into the top of the window and pull the tint towards the side you’ve just cut. By now, you’ll have three sides cut except the top and ½-1 inch of excess tint over the sides. Flatten the film again using the squeegee.
The last step is to cut along the top of the window while lowering your window and remove the excess film. This will leave you with half an inch of extra film on all sides.
Applying the Window Tint
Applying tint to the interior window is the most critical part. The first thing to do is to ensure that your glass is spotless and add spray solution. Lift the film by taking the two top corners and drape it on the top of the glass to stick it on. Using your squeegee or tinter’s card, remove the bubbles and creases, add slip solution over the tint, and squeegee out excess water.
As a rule of thumb, start your squeegee at the top in the center, down, then off to the side in both directions. After this, squeegee horizontally to the bottom. If you notice any deformities or imperfections, use your card, heat gun, or fingertips to squeeze them out.
Remember to tuck the film into the weatherstripping or seals to create a tight fit and prevent leaks. Ideally, tucking the film into the weatherstripping will help achieve a clean, neat, and leak-free product. A shank tool or anything thin enough will come in handy in this process.
Since automotive glass is not flat, you need to be careful to ensure that the film adheres to the shape of the glass. More specifically, you’ll achieve this by shrinking. The film will automatically mold to the shape of the glass when you heat it and is a crucial step to ensure you have a professional-looking tint job.
However, the heat drinking technique is not applicable on all windows, including laminate glass. To that end, ensure to pass your heat gun over raised sections or “fingers” until the film reacts. When you are through with one finger, repeat the process with other fingers. After that, cut your tint to shape and apply it to your glass interior. All through, smooth everything out with a squeegee.
Cleaning and Drying
Now that the legwork is over, the next step is to clean up the tinted windows and allow the film to dry out. Wipe and dry any wet spots in the vehicle and clean your tools. Sometimes you might experience electronic issues due to water. Don’t worry, though, as this issue will resolve after some time.
Be Patient for the Tint to Cure
Usually, the dry-out process will take about 3-5 days. However, a good, dry seal might take up to 2-3 weeks to form. The best thing is to be patient and place your car in a warm, dry place for a week. During this time, don’t roll down your windows to avoid messing with your tint job.
Window Tinting – Parting Shot
As you can see, DIY window tint is not impossible. Of course, a DIY project is not the easiest job and requires its own set of skills and tools to get the desired results. The best part is that eliminating labor costs when you do it yourself makes your tint job less expensive. Although it is a tedious process, doing it yourself will give you a sense of accomplishment.